How to Organise a Pantry
Organising your pantry doesn’t have to be overwhelming. With the right steps and tools, you can transform your pantry into a functional, stylish space that makes meal prep a breeze. At Little Label Co., we’re all about helping you create order and calm in your home. Let’s dive into this step-by-step guide to organising your pantry!
Why Organise Your Pantry?
A clutter-free pantry isn’t just about aesthetics—it saves time, reduces food waste, and makes cooking more enjoyable. Imagine opening your pantry and instantly finding what you need—no more digging through half-empty packets or expired cans!
Step-by-Step Guide to Organising Your Pantry
Step 1: Plan and Gather Supplies
First, assess your pantry. What’s working? What’s not? Take measurements of your shelves and storage spaces to plan effectively. Here are some tips:
- Use turntables for oils and sauces—they make reaching items at the back so much easier.
- Opt for stackable containers to maximise vertical space.
- Invest in airtight containers to keep food fresh and prevent pests.
- Create a shopping list for all the storage solutions you need—check out Little Label Co.’s modern storage options for ideas!
- Once you’ve got your supplies, clean them thoroughly and let them air dry overnight.
Step 2: Clean Your Pantry
Take everything out of your pantry (an ironing board nearby can help as extra space!). As you do this:
- Check expiration dates and toss anything that’s gone bad.
- Group similar items together (e.g., snacks, canned goods, baking supplies).
- Wipe down shelves with a non-toxic cleaner and a microfibre cloth.
Step 3: Create Zones
Now it’s time to organise by zones based on your lifestyle. Here are some ideas:
- Everyday staples: Keep these at eye level for easy access.
- Snacks: Store these in baskets or on lower shelves for kids to grab quickly.
- Dry ingredients: Use airtight containers to keep them fresh.
- Canned goods: Line them up in rows so you can see what you have at a glance.
- Oils: Place these on a lazy Susan or in a plastic container to catch spills.
- Don’t forget non-refrigerated veggies like potatoes and onions—store them in a cool, dark place!
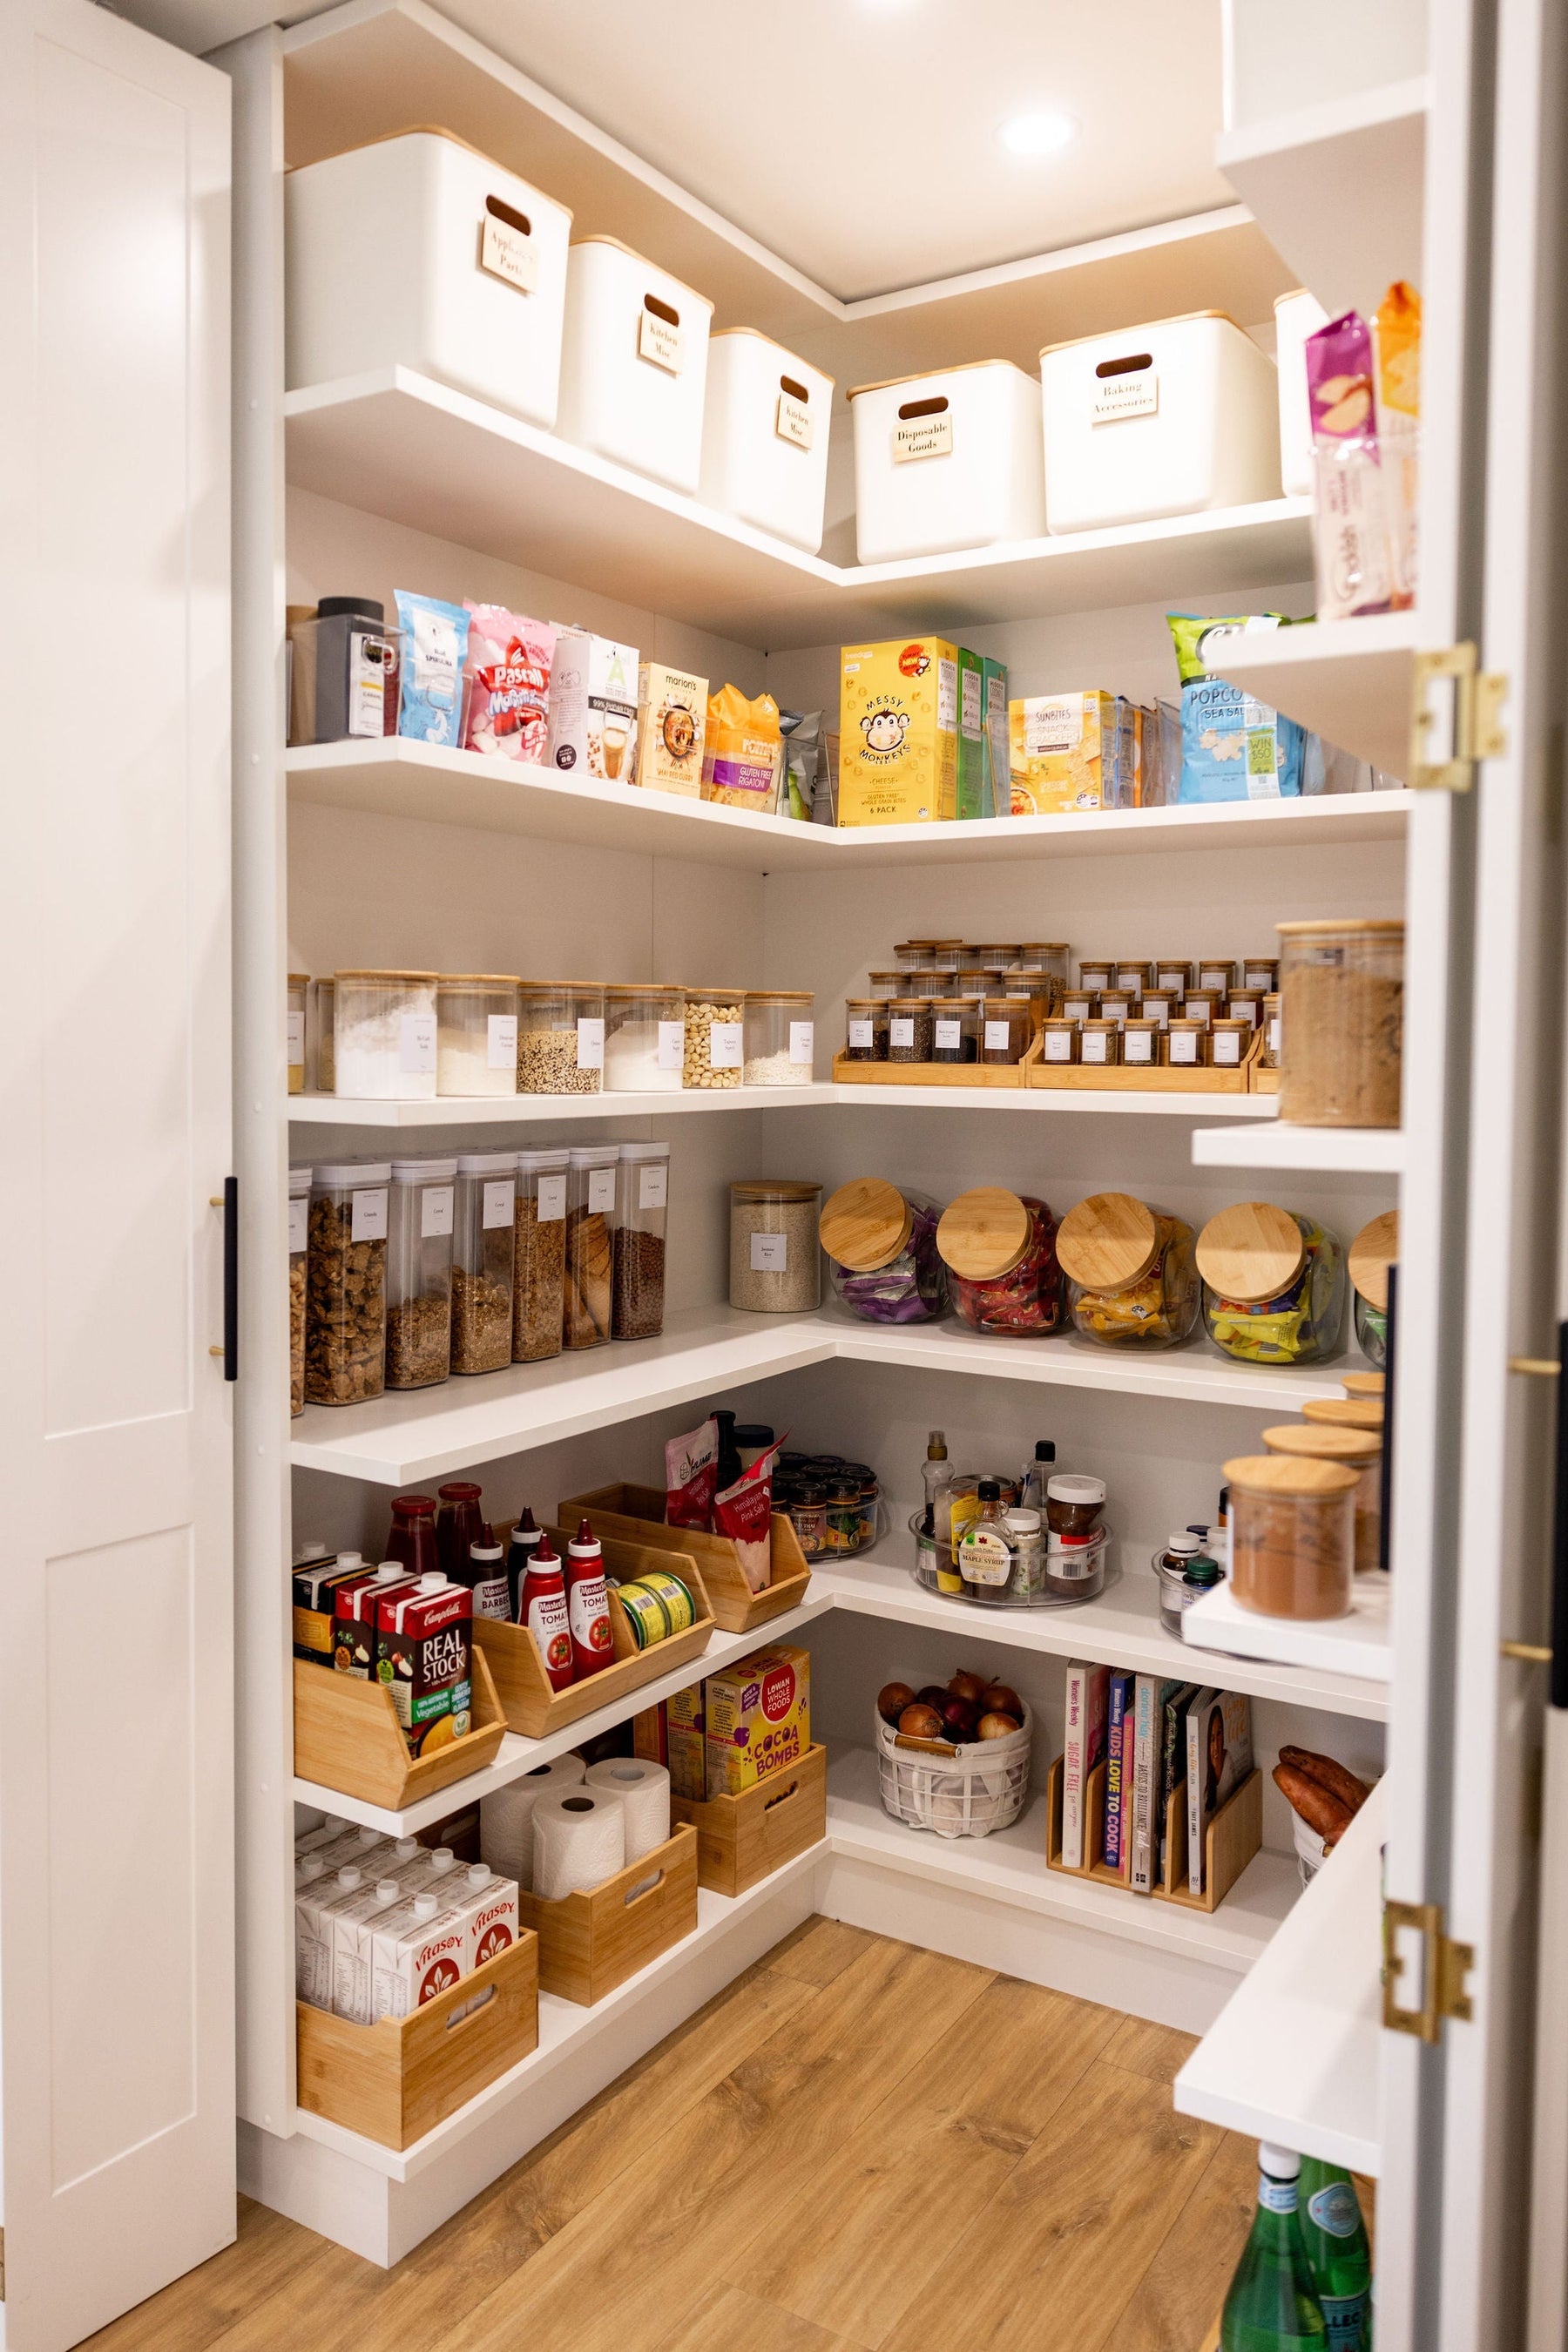
Step 4: Organise and Label Everything
Here comes the fun part—putting everything back! Use clear containers so you can see what’s inside, and label each one with custom labels from Little Label Co. (we’ve got everything from pantry labels to spice stickers!). For extra convenience, use our used by date stickers to keep track.
Step 5: Meal Plan
Finally, create a meal plan using any soon-to-expire products you grouped earlier. This step helps reduce waste and ensures nothing goes unused.
FAQs About Pantry Organisation
Why is labelling important in pantry organisation?
Labelling keeps everything in its place and makes it easy for everyone in the household to find what they need without creating chaos.
How often should I reorganise my pantry?
We recommend doing a quick tidy-up every few months to ensure your system is still working for your needs.
What are the best containers for dry goods?
Airtight containers are essential for keeping dry goods fresh and pest-free. Little Label Co.’s modern storage solutions are both functional and stylish.
FAQs About Little Label Co.
Who is Little Label Co.?
Little Label Co, founded by Natalie Manoushian in 2016, is Australia’s leading home organisation brand offering custom labels and modern storage solutions for every room in your home.
What products does Little Label Co. offer?
We sell custom labels, pantry stickers, spice jars, bamboo storage solutions, laundry packs, and more—all designed to make organising simple and beautiful.
Where can I shop Little Label Co.’s products?
Visit our website here or follow us on Instagram @little_label_co for inspiration! Organising your pantry doesn’t have to be complicated or time-consuming when you follow these steps. With Little Label Co's tools and tips, you’ll have a pantry that’s not only functional but also Instagram-worthy! Happy organising! 😊
Leave a comment